
How to Choose Landscape Lighting Fixture Locations: A Property-Wide Guide
Chris Kelly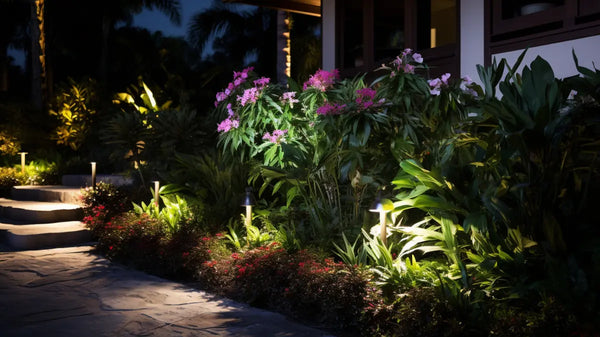
Choosing fixture locations is where a landscape-lighting plan becomes a real nighttime design. The best location is not simply the closest open patch of soil. It is the position that lets the fixture illuminate the intended target, control glare, avoid maintenance conflicts, and connect cleanly to the rest of the low-voltage system.
Use this guide for the property-wide placement process. Then use the more specific path-light, spotlight, and wall-wash guides when a particular technique needs finer adjustment. For complete area-by-area examples, see How to Light a Front Yard and How to Light a Backyard & Outdoor Living Space.
1. Mark the Important Viewing Areas First
Before placing fixtures, identify where people will normally see the property from after dark.
Important viewpoints may include:
- street or driveway approach
- front entry and primary walkway
- patio, deck, or outdoor seating area
- windows facing the landscape
- side-yard or backyard circulation routes
- pool, garden, or outdoor-living areas
A fixture can light its target correctly and still be poorly placed if the lamp or lens produces glare from an important viewing position.
2. Decide What Each Fixture Is Supposed to Light
Give every proposed fixture a target or purpose before selecting its final position.
Examples:
- guide a walkway
- reveal a change in elevation
- uplight a tree trunk or canopy
- highlight a column or architectural detail
- wash a broad wall
- graze textured stone or brick
- add light beneath a retaining-wall cap
- illuminate a deck post or stair
If you cannot explain what a fixture is supposed to accomplish, it may not need to be in the plan.
3. Match the Fixture Type to the Location
Different fixture categories are designed for different placement problems.
- Path lights: walkways, garden borders, and planting beds.
- Uplights and spotlights: trees, architecture, focal points, and directional accents.
- Well lights: lower-profile uplighting where the site and fixture application support an in-ground position.
- Downlights: elevated mounting points where illumination should come from above.
- Deck lights: posts, vertical surfaces, and outdoor living areas.
- Step lights: stairs, risers, landings, and elevation changes.
- Hardscape lights: retaining walls, seat walls, capstone, and built masonry features.
Use How to Choose Landscape Lighting Fixtures when you need help selecting the fixture category itself.
4. Place Path Lights Around the Walkway, Not a Tape-Measure Pattern
A path-light layout should respond to the shape of the walkway, planting, fixture height, and pool of light.
A useful starting point for many residential layouts is roughly 8–10 feet between fixtures, often staggered rather than placed in matched pairs. Then adjust around:
- curves
- steps
- changes in grade
- large planting
- entries and intersections
- fixture shade size and lamp output
Use Landscape Path Light Spacing & Placement for the detailed layout process.
5. Position Uplights and Spotlights From the Target Geometry
Do not start with a universal setback such as “place every spotlight one foot from the house.” The right distance depends on the target and the beam.
For example:
- a narrow column can use a more concentrated beam
- a broad wall may need additional distance or a wider distribution
- a tree trunk can be grazed from closer range
- a mature canopy may need room for the beam to open before it reaches the branches
See How to Position Landscape Spotlights for Trees & Architecture for distance, beam-angle, and aiming guidance.
6. Choose Wall-Wash and Grazing Positions Differently
A wall wash and a wall-grazing effect should not use the same position automatically.
- Wall washing: generally gives the beam more room to spread for broader, smoother illumination.
- Wall grazing: places the light closer to a textured surface so highlights and shadows reveal brick, stone, or relief.
Use Wall Washing vs Wall Grazing before fixing those positions permanently.
7. Account for Mature Plant Growth
Planting can change the usefulness of a fixture over time.
Before final placement, ask:
- Will a path-light shade still clear the plants at mature height?
- Will a shrub grow directly in front of an uplight?
- Will tree branches change the spotlight or downlight beam?
- Can the fixture still be reached for lamp replacement and aiming?
A position that looks perfect beside new landscaping can disappear into foliage after a few seasons.
8. Keep Fixtures Out of Routine Maintenance Paths When Practical
Above-ground fixtures are more likely to be damaged when they sit directly in mower, string-trimmer, cart, or heavy foot-traffic paths.
Where the lighting effect allows it, use planting beds, landscape edges, protected hardscape positions, or other locations that reduce repeated contact with maintenance equipment.
For cable-route and lawn-restoration planning, see How to Install Low-Voltage Landscape Lighting Without Damaging Your Lawn.
9. Think About the Wire Route Before Finalizing the Fixture
The visual position and the electrical layout should be planned together.
A fixture location may look good but create an unnecessarily long cable run or force a difficult connection point. Before finalizing the layout, mark:
- transformer location
- individual wire runs
- branch points
- connection locations
- approximate run lengths
Use How to Plan a Low-Voltage Landscape Lighting System for wiring-layout and transformer planning.
10. Do Not Let One Fixture Create Glare in Another Area
A fixture should be evaluated from more than the target itself.
After rough placement, look toward the fixture from:
- the main walkway
- the driveway
- patio seating
- frequently used windows
- neighbor-facing property edges when relevant
If the lamp or lens becomes the brightest object in the scene, adjust the fixture position, aiming, beam, or shielding as the product design permits.
11. Use Nighttime Testing Before Final Installation
Nighttime testing is one of the most valuable steps in fixture placement.
- Place the fixtures near their planned positions.
- Install the intended compatible lamps.
- Connect the temporary layout safely.
- Review the property after dark.
- Adjust spacing, distance, aiming, and lamp selection.
- Check the design from all important viewing locations.
- Only then finalize the fixture positions.
This catches hot spots, dark gaps, glare, blocked beams, and over-lighting before the landscape is restored around the fixtures.
12. Place Fixtures for Layers, Not Uniform Brightness
A property usually looks more dimensional when different areas receive different types and levels of illumination.
Instead of trying to make every square foot equally bright, create a hierarchy:
- primary architectural focal points
- important trees or planting
- walkway guidance
- outdoor living areas
- subtle background or edge lighting
Allowing some shadow between lit areas helps create depth and keeps the fixtures from becoming the focus.
13. Record the Final Fixture Locations
After the installation is complete, update the original property sketch so it reflects the actual system.
Record:
- fixture locations
- fixture or lamp SKUs when useful
- wire routes
- connection points
- transformer location and run assignments
An as-built map makes future maintenance, expansion, and troubleshooting much easier.
Common Fixture-Location Mistakes
- Placing fixtures before deciding what they should illuminate.
- Using the same setback or spacing everywhere.
- Ignoring glare from normal viewing areas.
- Putting path lights where mature plants will cover the shade.
- Placing above-ground fixtures directly in mower or traffic paths without a design reason.
- Finalizing the layout in daylight without testing after dark.
- Forgetting that the fixture still needs a practical wire route and service access.
- Adding fixtures simply to make every area equally bright.
Frequently Asked Questions
Where should I start when placing landscape lights?
Start with the most important viewing areas and targets: primary walkways, the entry, architectural focal points, major trees, and outdoor living areas. Decide what each fixture should accomplish before choosing the exact position.
How far should an uplight be from a tree or house?
There is no universal distance. Target size, beam angle, fixture output, surface texture, and the desired effect determine the setback. Test the actual fixture after dark.
Should landscape lights be evenly spaced?
Not necessarily. Path lights can use a spacing rhythm, but curves, steps, planting, target size, and fixture type should control the final layout.
Should I hide landscape-lighting fixtures?
Keep the light source visually quiet when practical, but do not hide fixtures so completely that plant growth blocks the beam or future service becomes difficult.
How do I know if I have too many fixtures?
If every surface is equally bright, the fixtures themselves dominate the scene, or the property loses contrast and shadow, the design may be over-lit. Remove or reduce fixtures that do not have a clear lighting purpose.
Place for the Target, Then Adjust the Scene
The best fixture locations come from combining visual design with practical installation. Identify the target, choose the right fixture type, consider viewing angles and maintenance, plan the wire route, and then make the final decision after dark.
Browse Total Light landscape lighting fixtures, or use the complete landscape-lighting planning guide to coordinate fixture placement with lamps, transformer capacity, wire, connections, and controls.